Send Your Experience to WorkBuddy, Generate a Good-Looking Resume Directly
What This Case Solves
During last autumn's campus recruiting, I once hand-arranged a resume in PPT. It looked good but was painful to edit. Adding one experience meant everything after it had to move; one extra line of text meant re-tuning font size, spacing and pagination.
Later I turned this resume into HTML and packaged it as the Vibe Resume Skill. After installing it in WorkBuddy, writing a resume became very direct: send your experience and photo, tell the AI what role you want, and it generates a complete resume. When you have new experience, just keep sending it for edits.
Below is a full run I did in WorkBuddy.
What to Prepare Before Starting
I prepared three things:
- A personal-experience writeup, including education, internships and projects.
- A photo to put on the resume.
- The target role, e.g. "AI Product Manager Intern".
For public display, this case uses a fictional candidate and fictional experience.
Step 1: Install the Vibe Resume Skill
Create a new task in WorkBuddy and send this line:
Install this resume Skill for me:
https://github.com/KevinYoung-Kw/vibe-resume-skill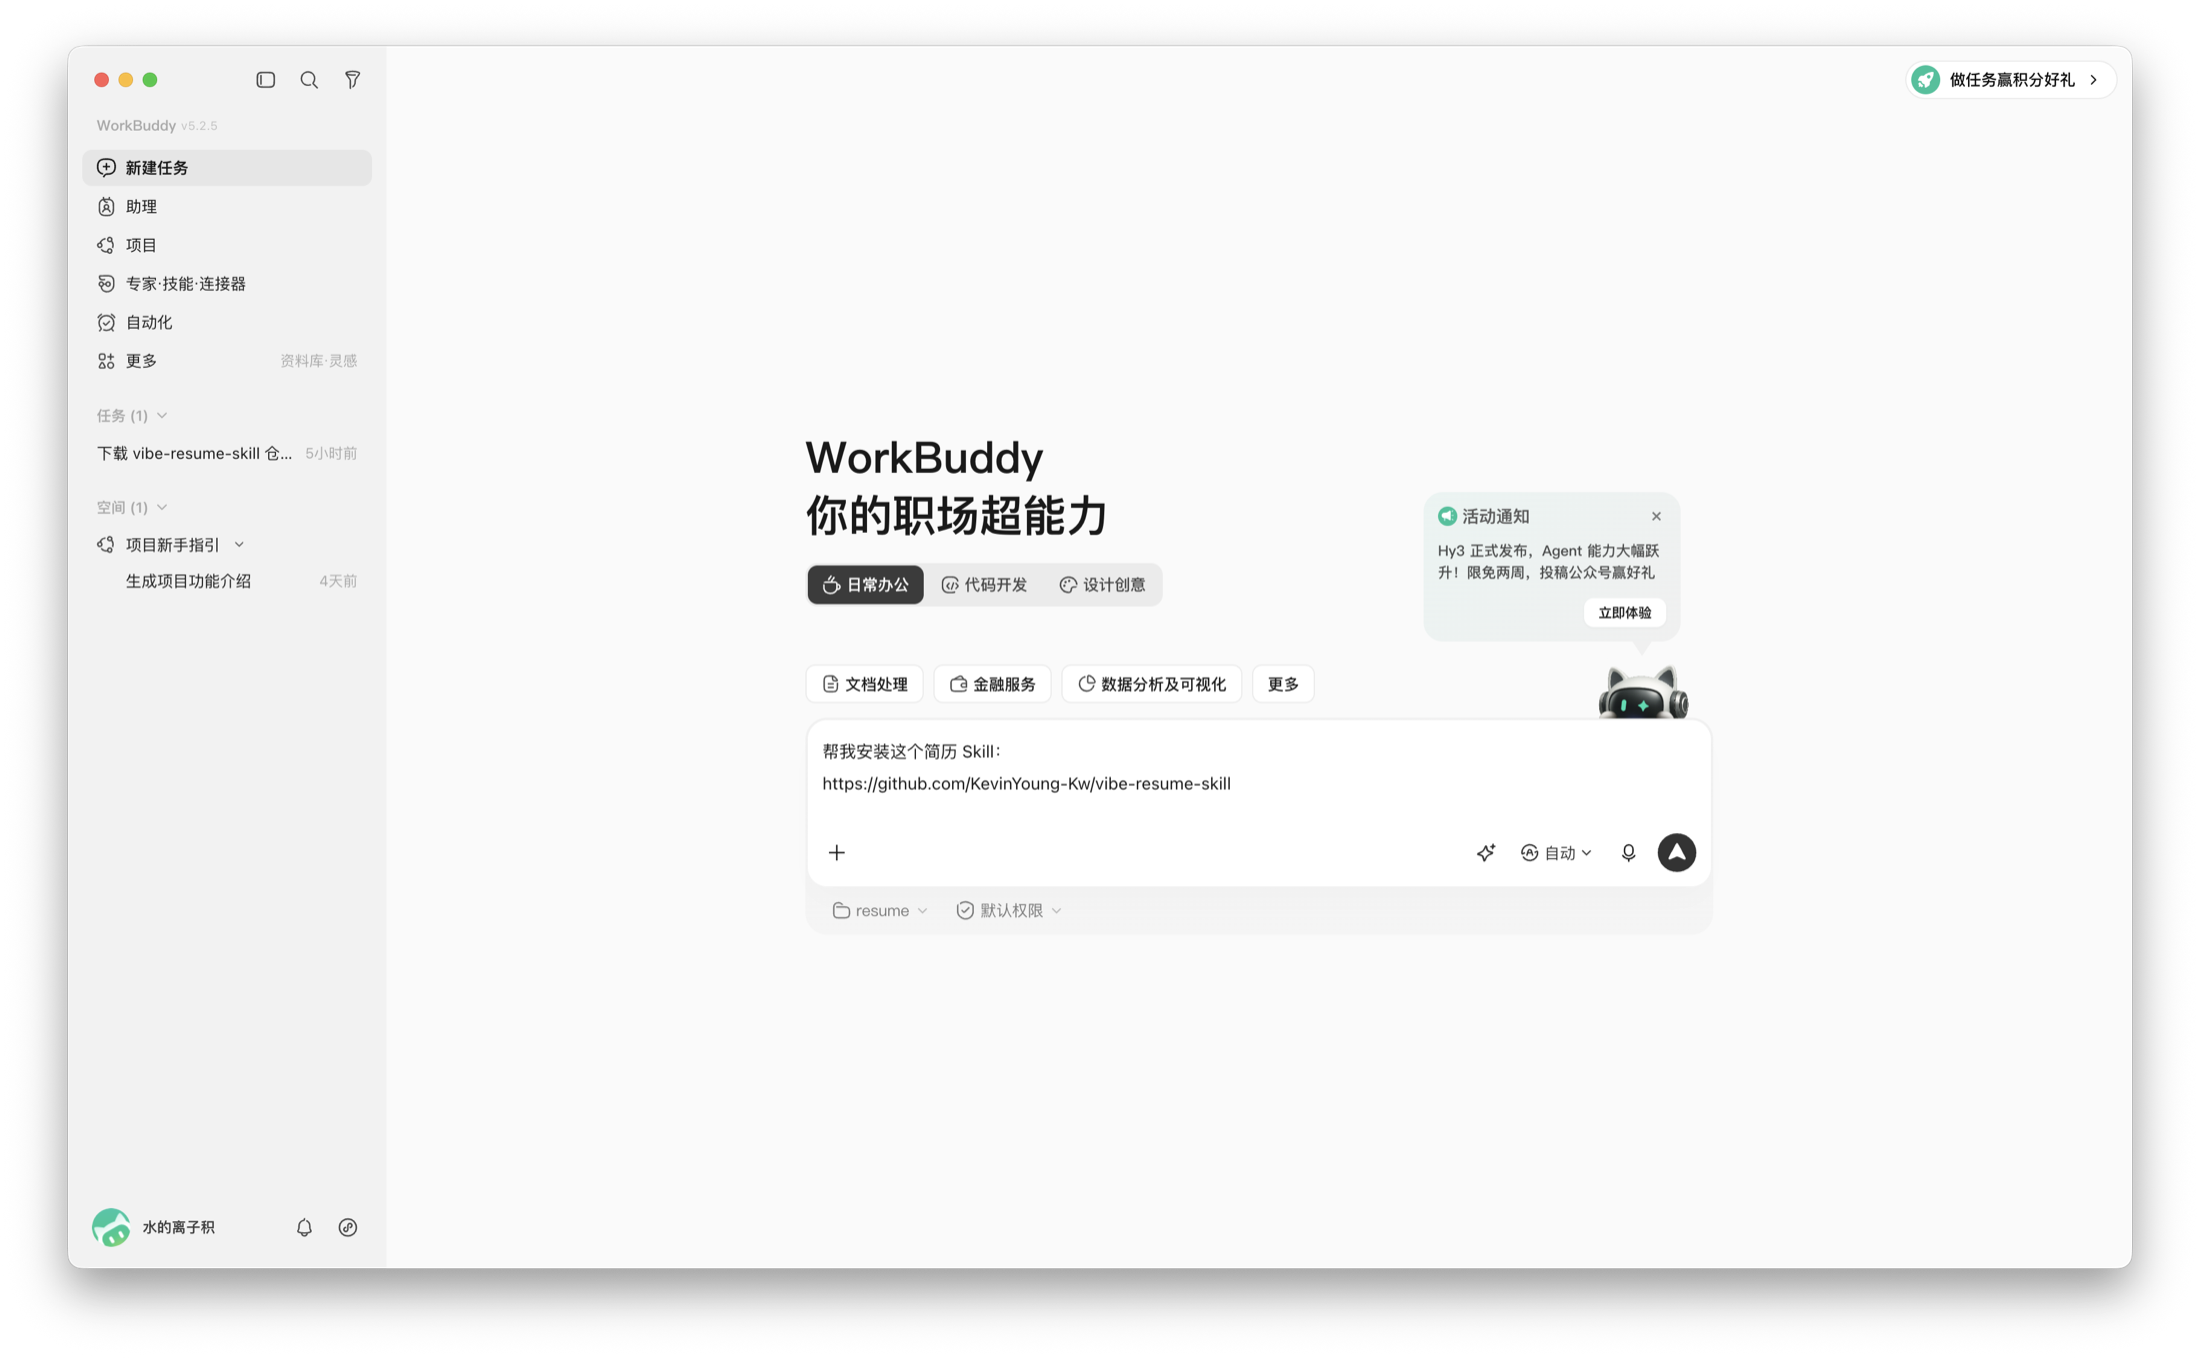
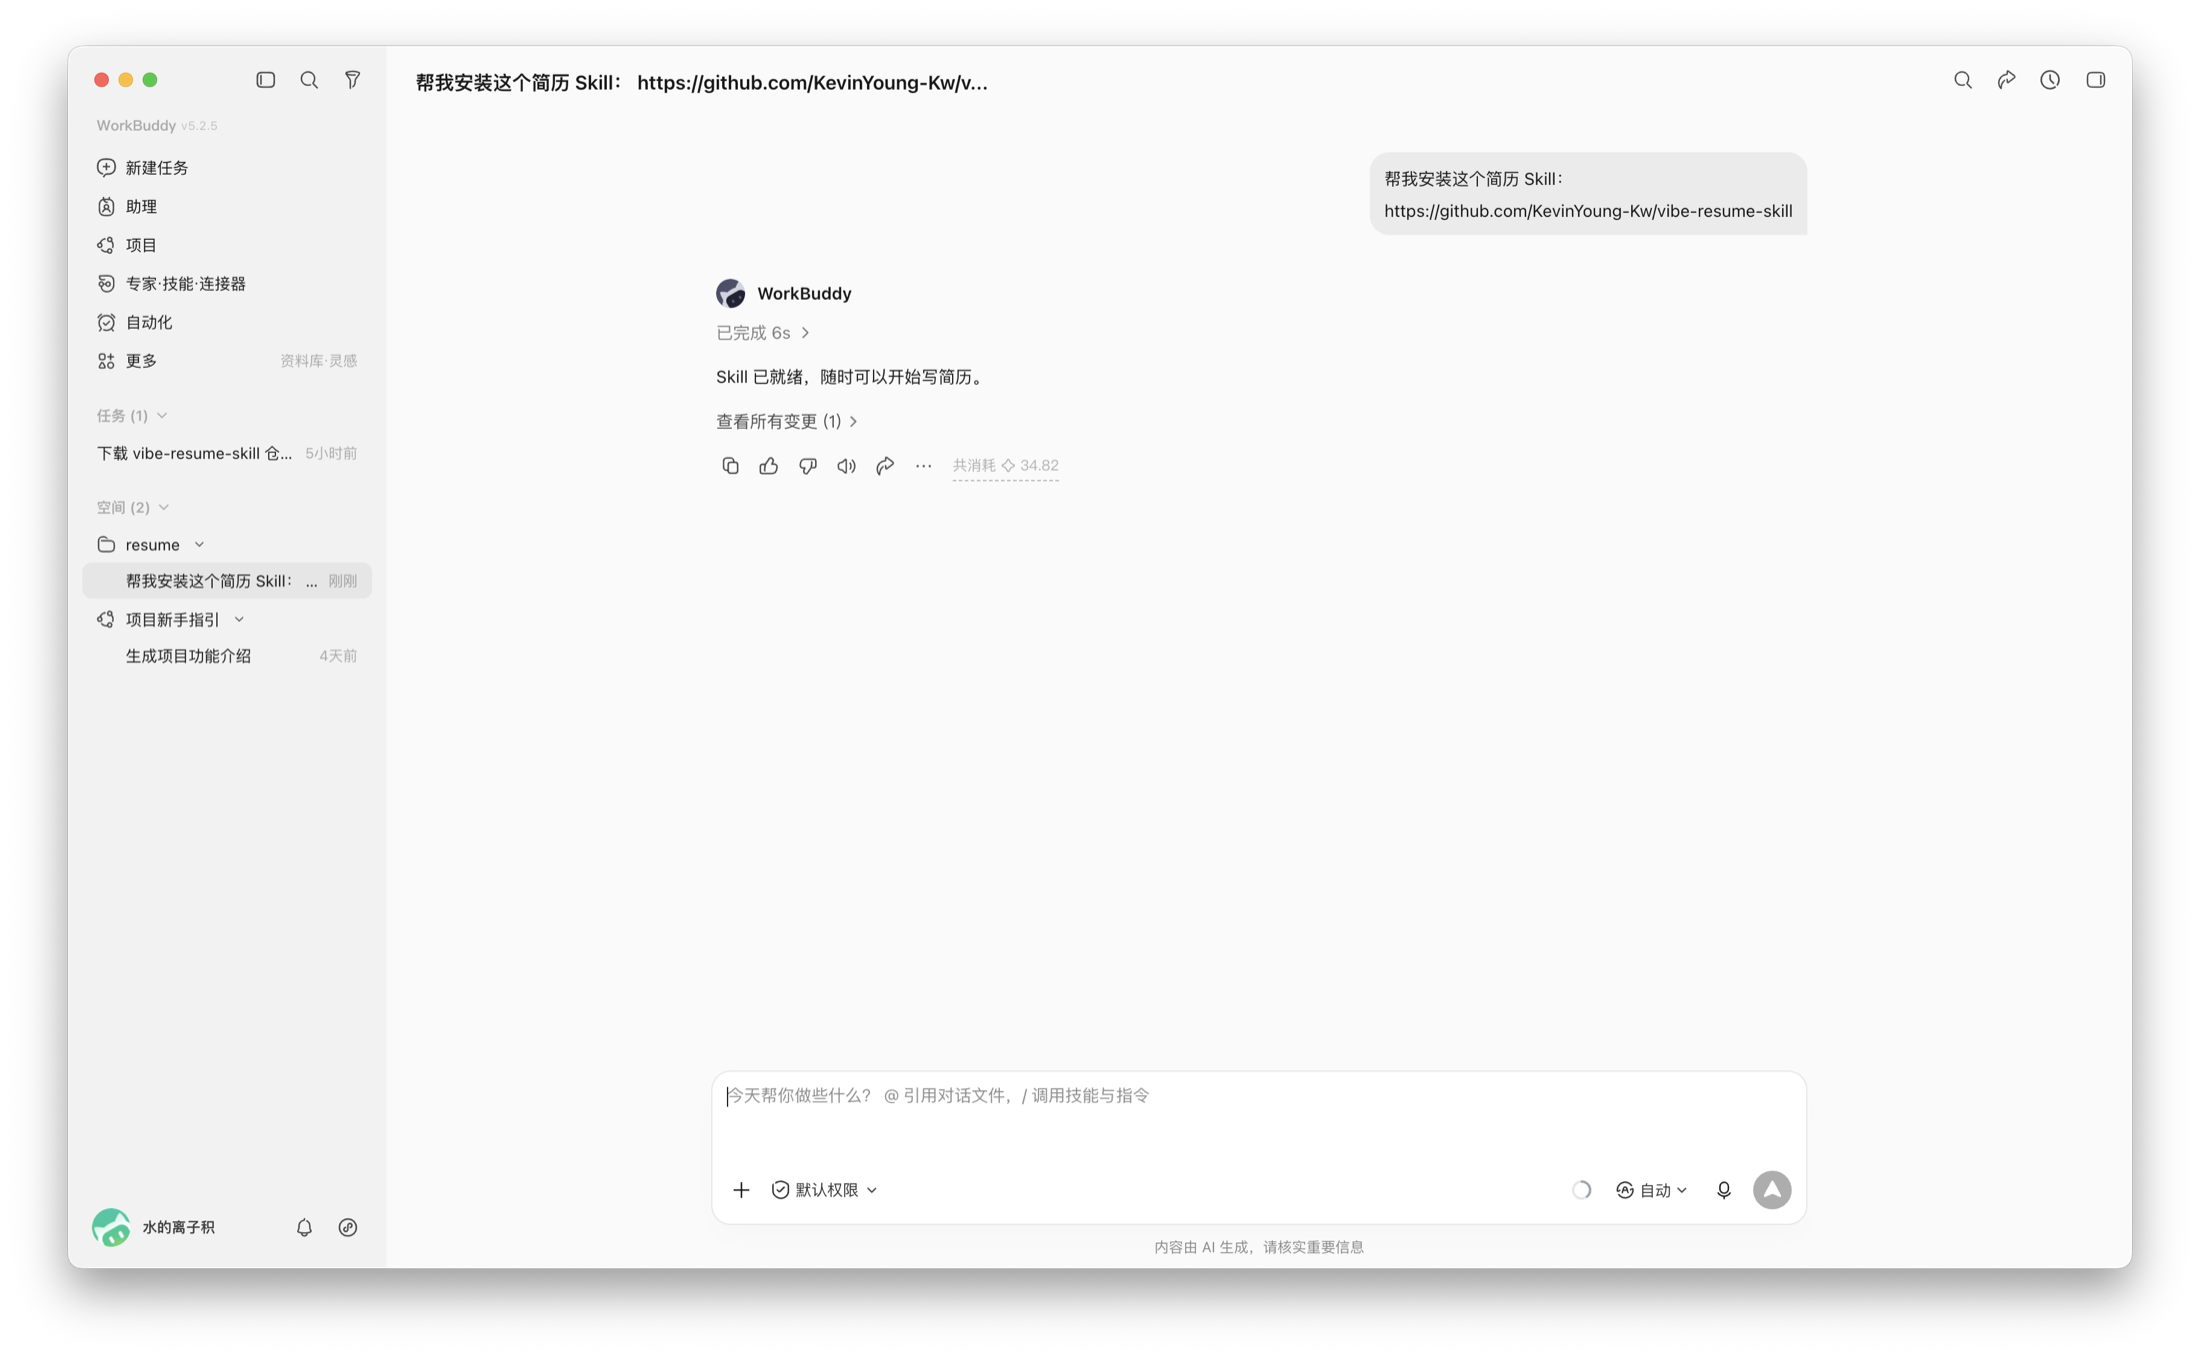
After install, WorkBuddy prompts that the Skill is ready to use.
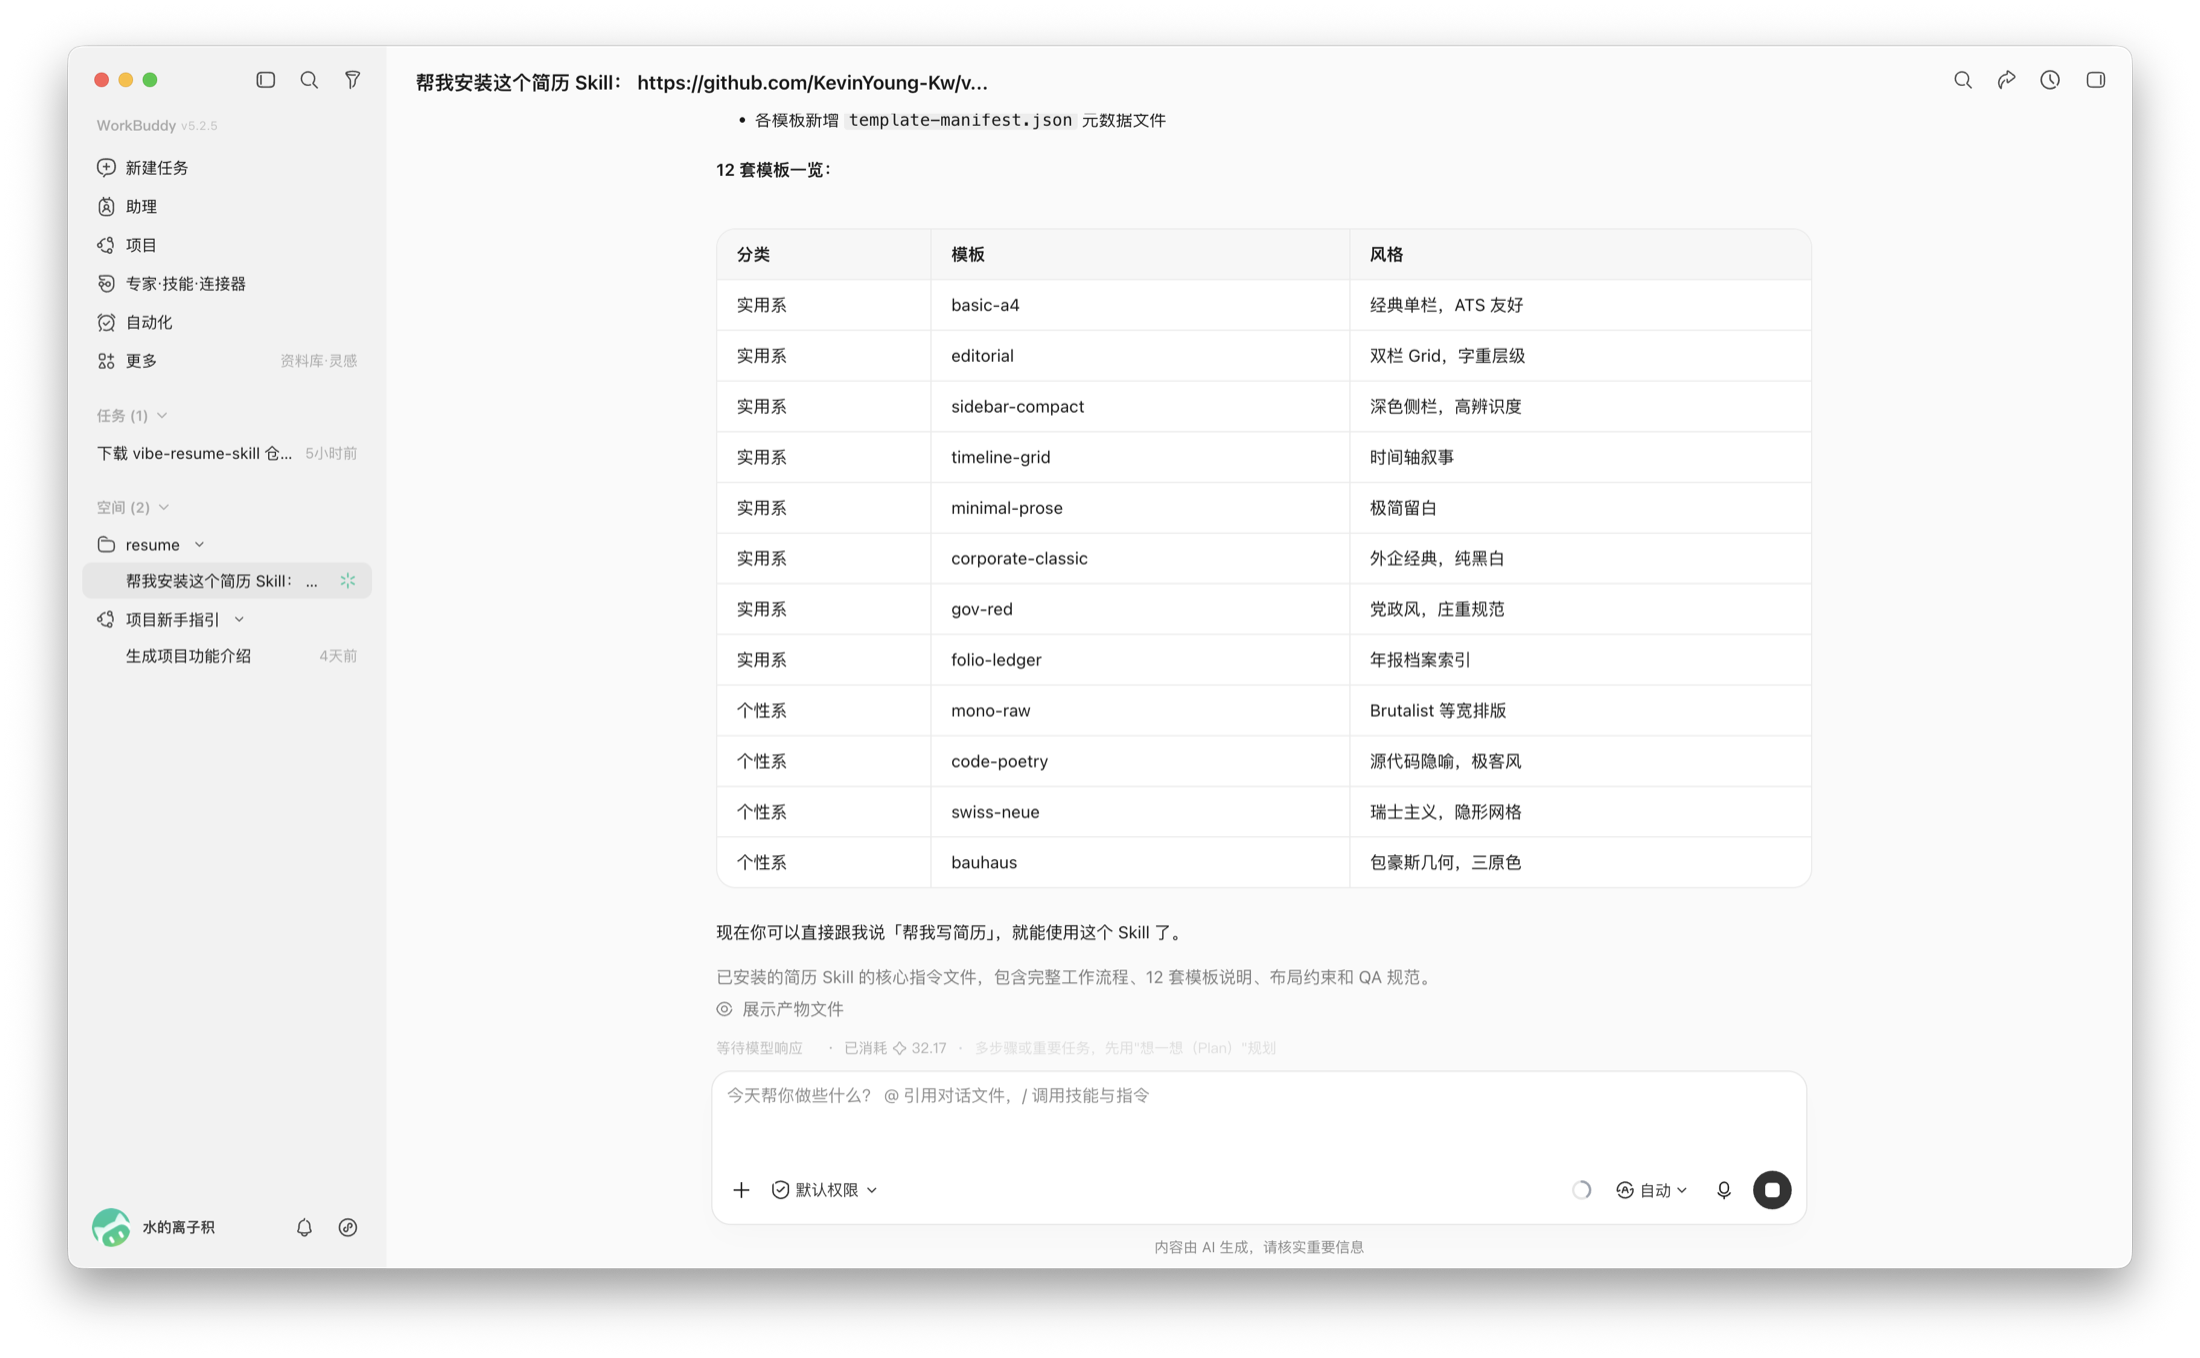
The Skill ships 12 resume templates. You can have WorkBuddy list them and pick one you like; if you don't want to pick, use the default template.
Step 2: Send Experience and Photo
I pasted my personal experience into the conversation, attached the photo, and sent:
This is my personal experience; I want to apply for AI Product Manager Intern.

Please use vibe-resume-skill to generate a resume for me.
Don't fabricate data that isn't there; keep it to one page if possible.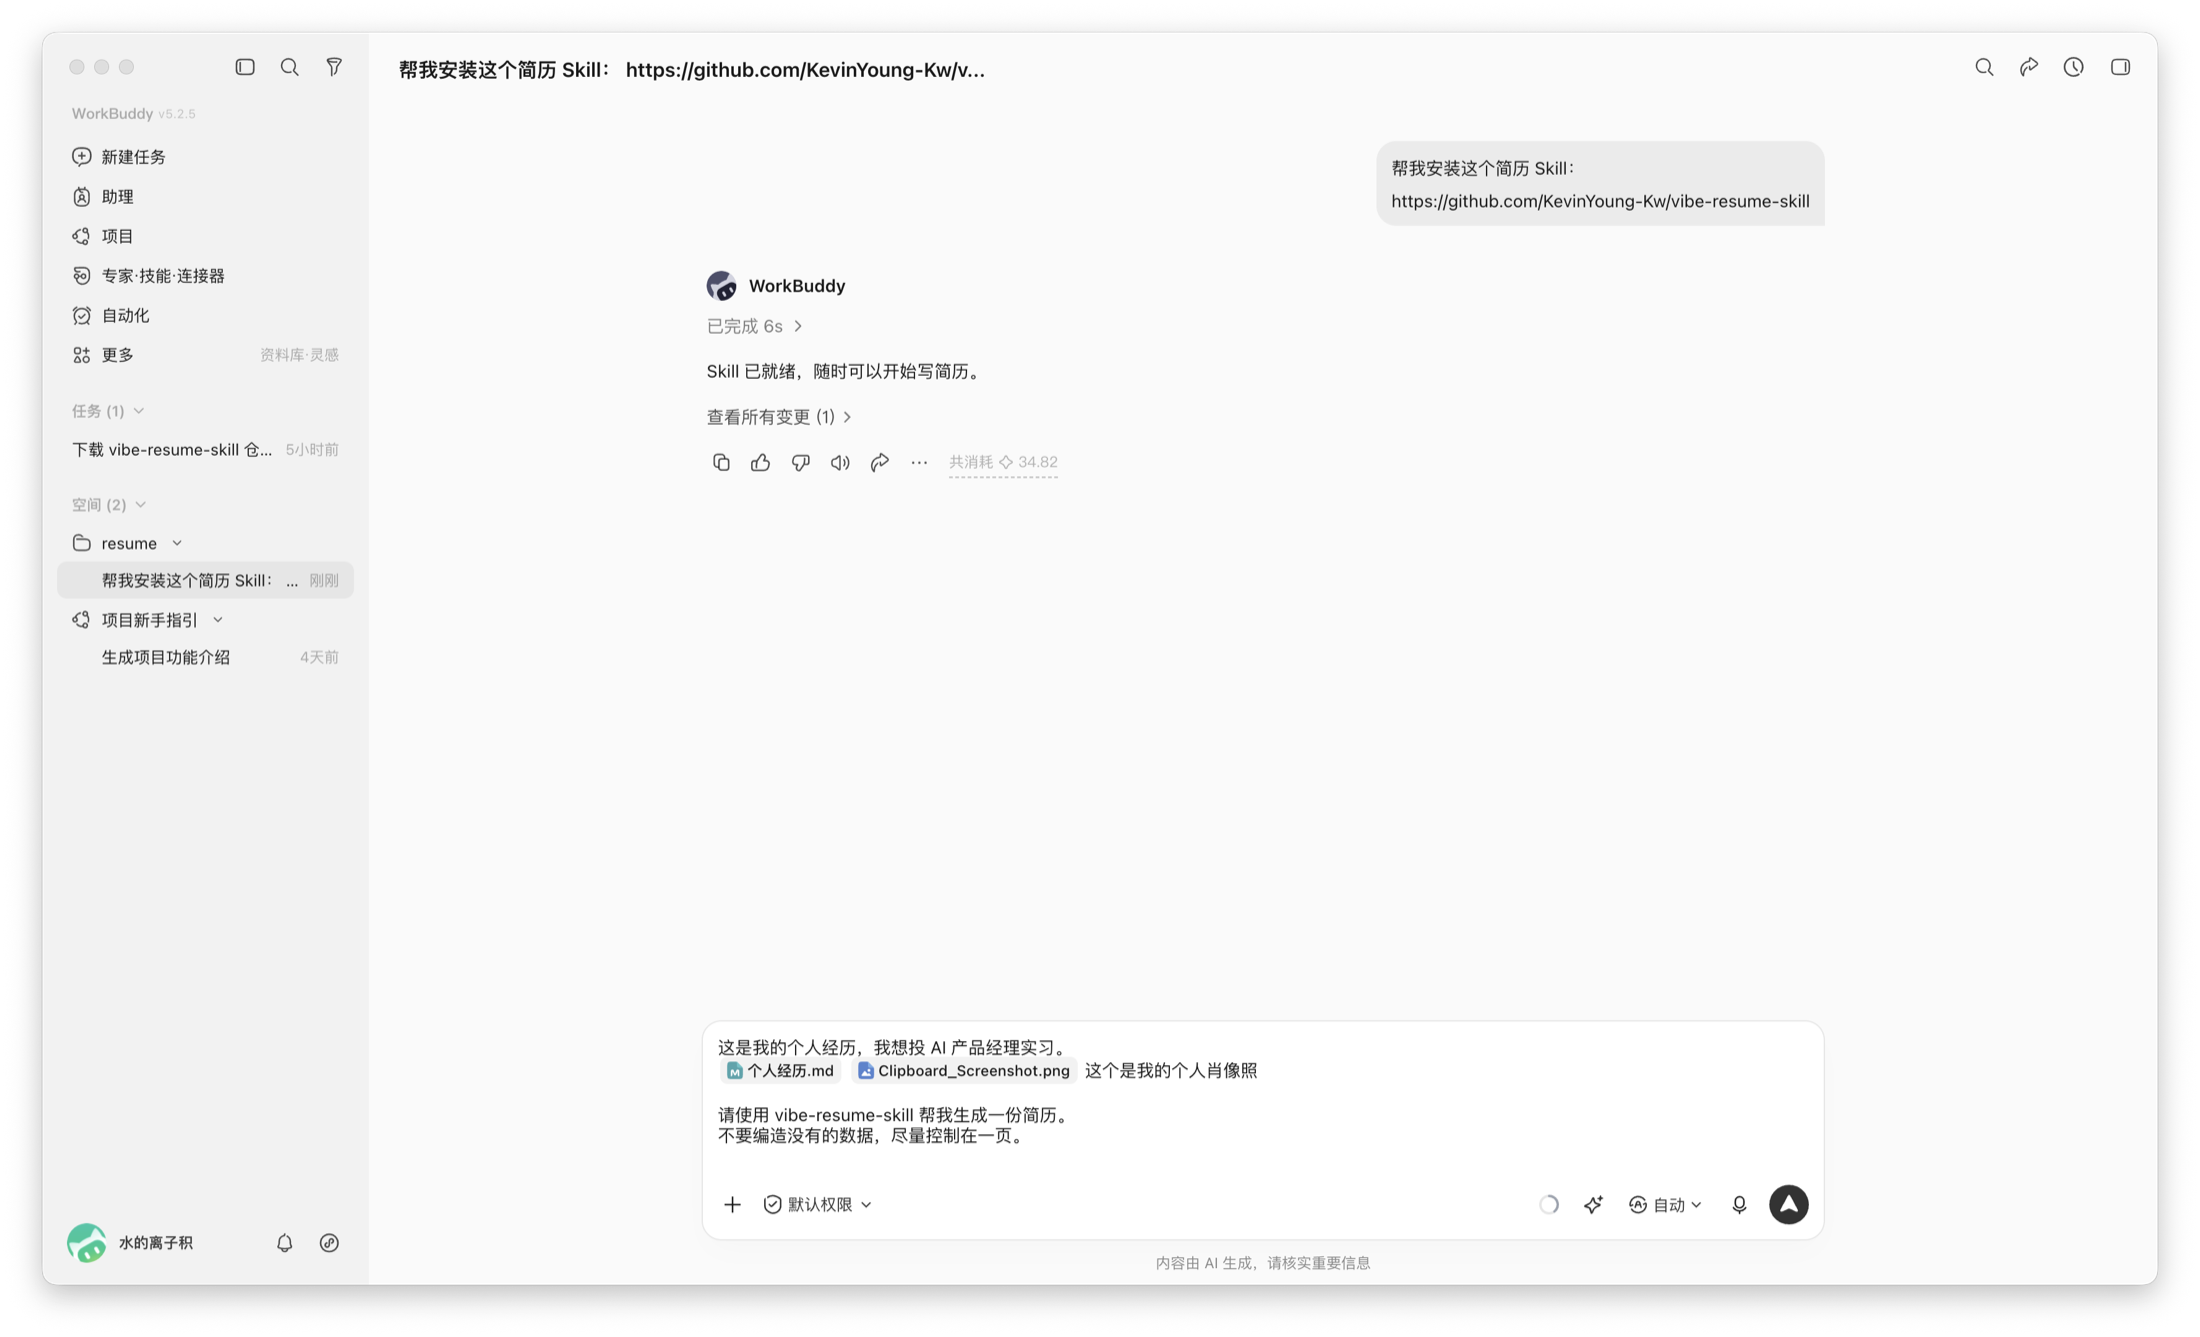
After WorkBuddy read the material, it started organizing content and layout. When the first version was done, the right side could preview the whole resume, and you also got HTML, PDF and a preview image.
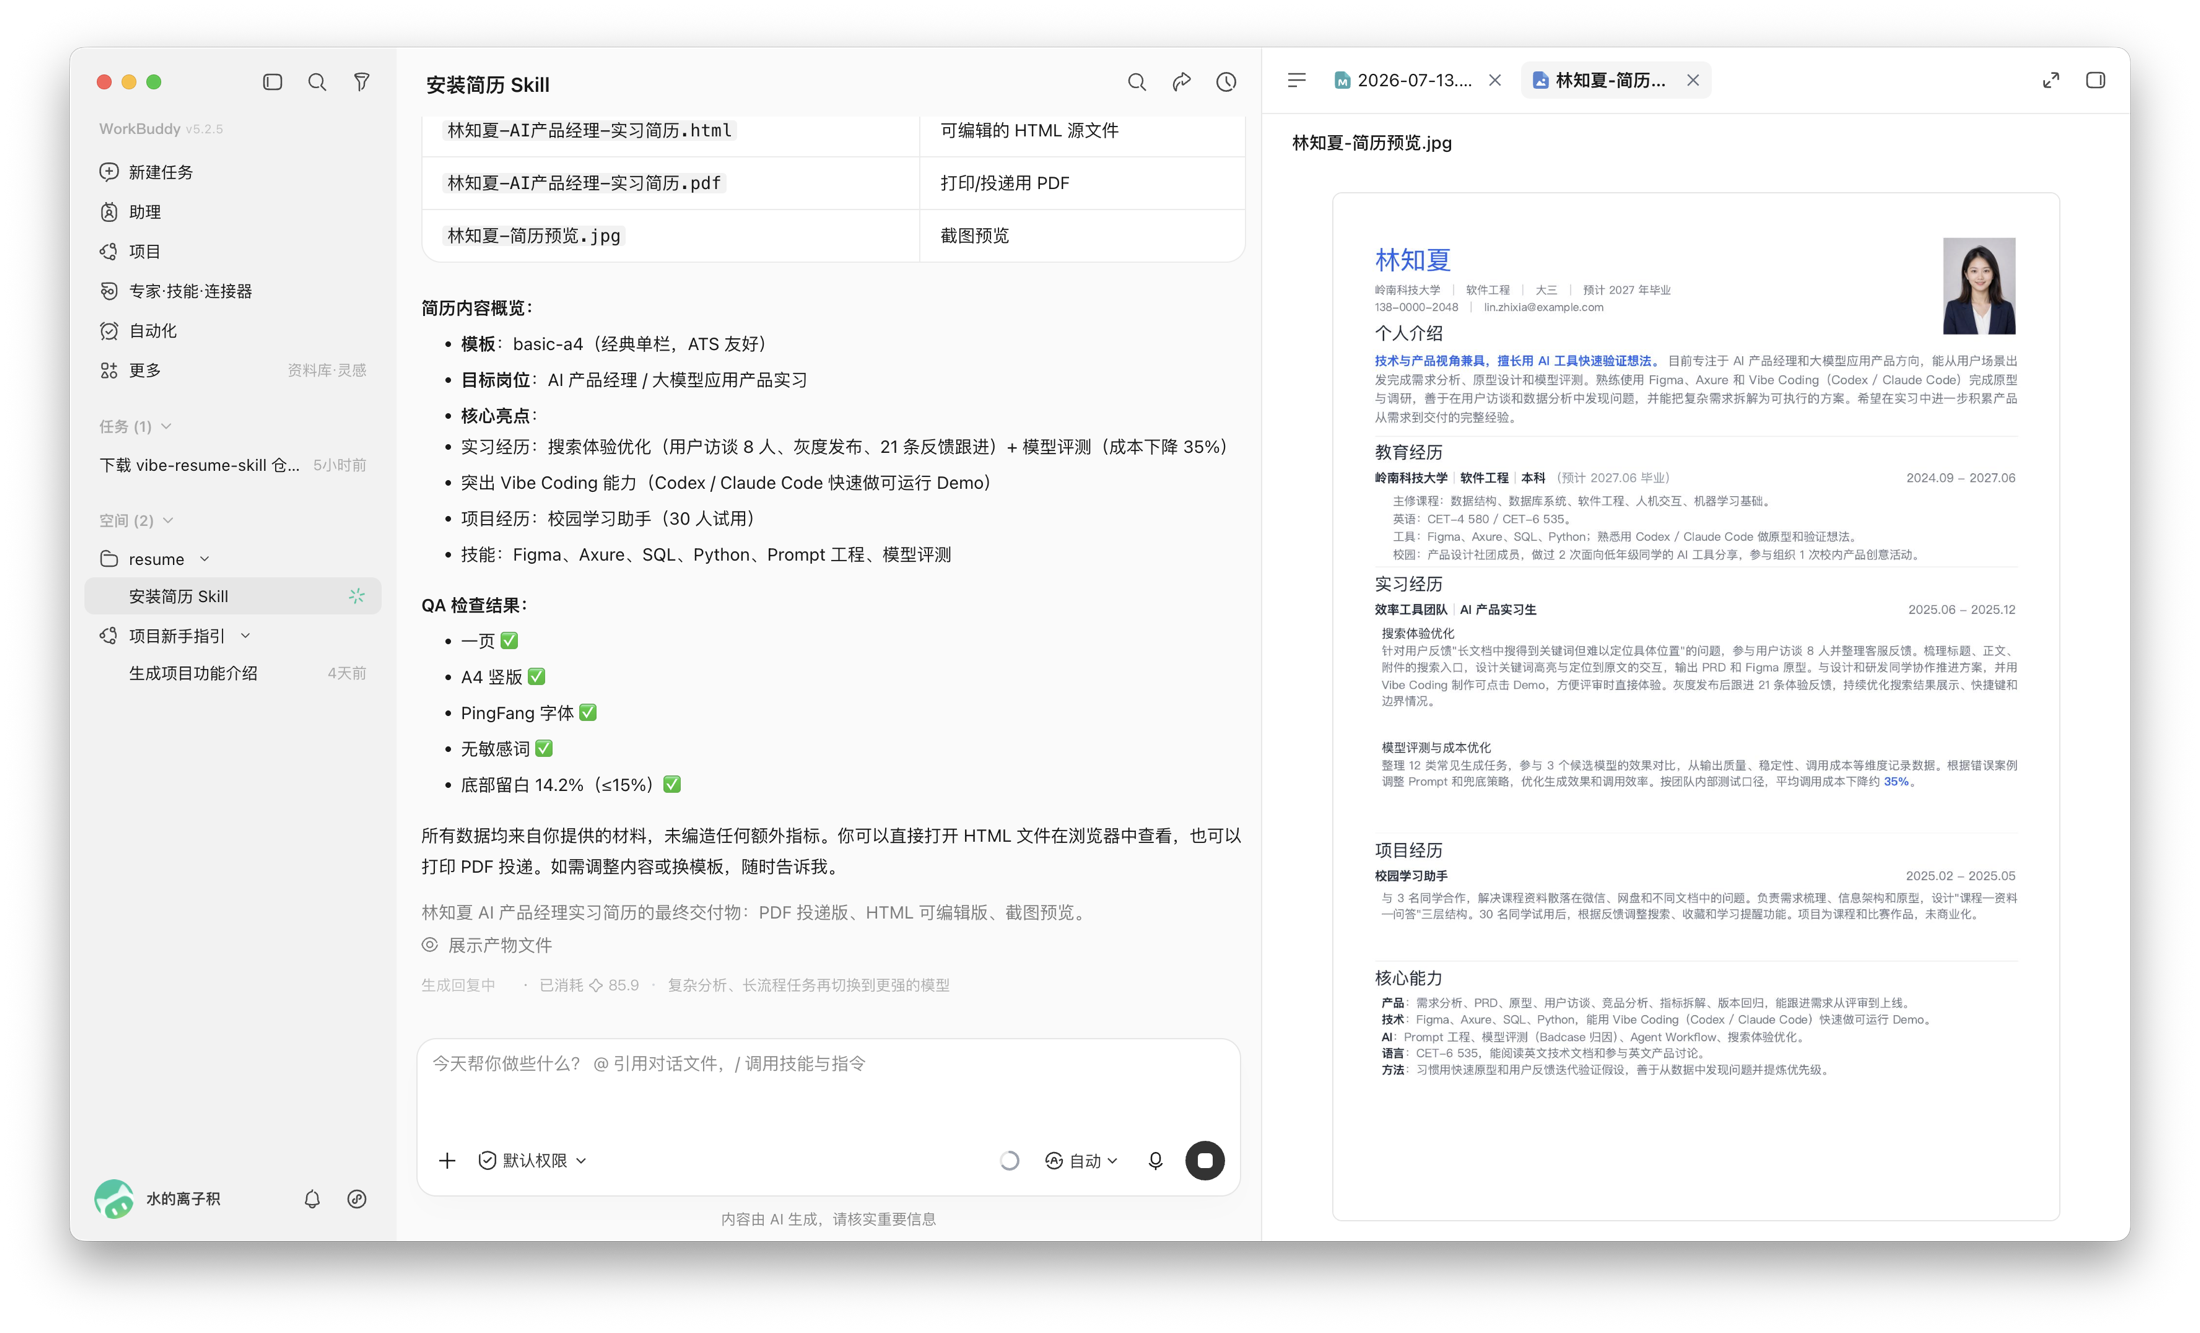
Step 3: Keep Editing
The first version's content was complete, but the spacing between sections was a bit loose. I just told WorkBuddy:
The sections are a bit sparse; tighten them up appropriately — don't cut content.Later I had a new internship experience; I kept pasting into the same conversation:
Here's a recently added experience; add it to the existing resume.
Don't remove the original content; still try to keep it one page.
WorkBuddy added the new experience to the original resume and re-tuned the page spacing. Both before-and-after content stayed in the same task — no need to remake a resume.
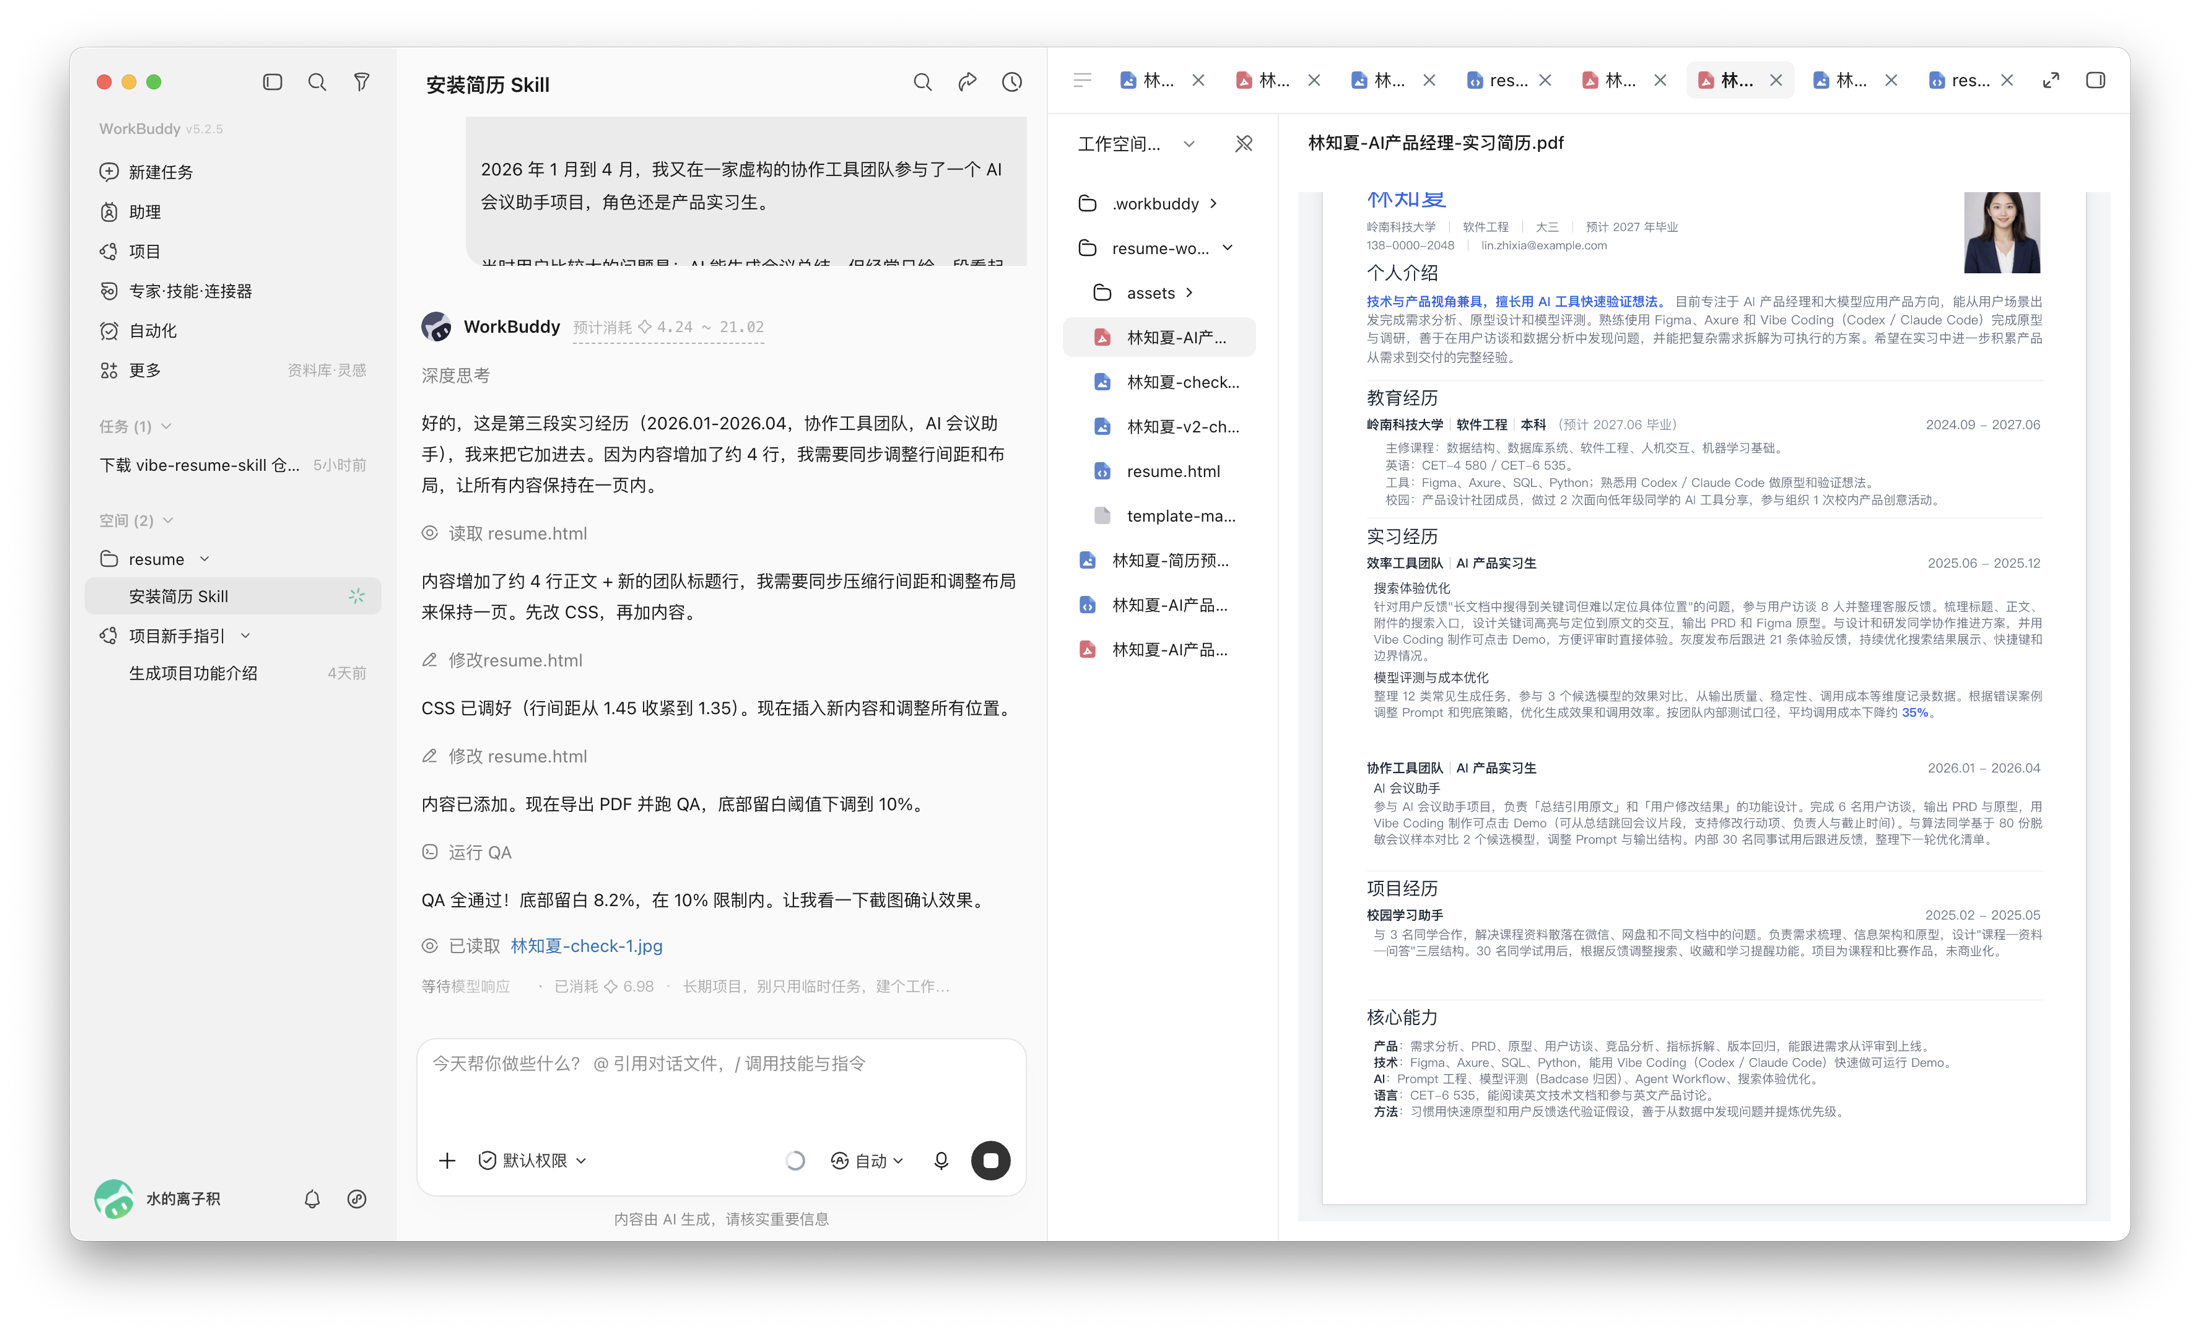
What You Get in the End
This run produced three files:
- HTML: editable; you can keep modifying it when adding experience later.
- PDF: keeps one page; directly usable for applications.
- Preview image: handy for a quick full-page view.
The final version added the new internship, the page still kept to one page, and text and photo displayed fully. Experience, dates and data also matched the provided material.
How Else to Use It
If you don't have a resume yet, you can directly send scattered experience to WorkBuddy and have it organize and generate a first version.
If you already have a Word, PDF or HTML resume, send the old resume plus the new experience and have it edit on the original.
If you're applying to different roles, attach the JD and have WorkBuddy adjust experience order and content focus separately.
Notes When Using
After AI generation, remember to verify name, contact info, experience dates and data. For content involving company-internal info, desensitize before sending.